コンポーネント指向で開発したい
既存実装の整理ベースで考える
これまで,createApp API や Reactivity System, Virtual DOM を小さく実装してきました.
今現時点での実装では Reactivity System によって UI を動的に変更することもできますし, Virtual DOM によって効率的なレンダリングを行うことができているのですが,開発者インタフェースとしては全ての内容を createApp API に書く感じになってしまっています.
実際にはもっとファイルを分割したり,再利用のために汎用的なコンポーネントを実装したいです.
まずは既存実装の散らかってしまっている部分を見直してみます.renderer.ts の render 関数をみてください.
const render: RootRenderFunction = (rootComponent, container) => {
  const componentRender = rootComponent.setup!()

  let n1: VNode | null = null
  let n2: VNode = null!

  const updateComponent = () => {
    const n2 = componentRender()
    patch(n1, n2, container)
    n1 = n2
  }

  const effect = new ReactiveEffect(updateComponent)
  effect.run()
}
render 関数内にルートコンポーネントに関する情報を直接定義してしまっています.
実際には,n1 や n2, updateComponent, effect は各コンポーネントごとに存在します.
実際,これからはユーザー側でコンポーネント(ある意味でコンストラクタ)を定義してそれをインスタンス化したいわけです.
そして,そのインスタンスが n1 や n2, updateComponent などを持つような感じにしたいです.
そこで,コンポーネントのインスタンスとしてこれらを閉じ込めることについて考えてみます.
~/packages/runtime-core/component.tsにComponentInternalInstanceと言うものを定義してみます. これがインスタンスの型となります.
export interface ComponentInternalInstance {
  type: Component // 元となるユーザー定義のコンポーネント (旧 rootComponent (実際にはルートコンポーネントだけじゃないけど))
  vnode: VNode // 後述
  subTree: VNode // 旧 n1
  next: VNode | null // 旧 n2
  effect: ReactiveEffect // 旧 effect
  render: InternalRenderFunction // 旧 componentRender
  update: () => void // 旧updateComponent
  isMounted: boolean
}

export type InternalRenderFunction = {
  (): VNodeChild
}
このインスタンスが持つ vnode と subTree と next は少しややこしいのですが, これから,VNode の type として ConcreteComponent を指定できるように実装するのですが,instance.vnode にはその VNode 自体を保持しておきます. そして,subTree, next というのはそのコンポーネントのレンダリング結果である VNode を保持させます.(ここは今までの n1 と n2 と変わらない)
イメージ的には,
const MyComponent = {
  setup() {
    return h('p', {}, ['hello'])
  },
}

const App = {
  setup() {
    return h(MyComponent, {}, [])
  },
}
のように利用し,
MyComponent のインスタンスを instance とすると,instance.vnode にはh(MyComponent, {}, [])の結果が,instance.subTree にはh("p", {}, ["hello"])の結果が格納される感じです.
とりあえず,h 関数の第一引数にコンポーネントを指定できるように実装してみましょう.
と,言ってもただ単に type としてコンポーネント定義のオブジェクトを受け取るようにするだけです.~/packages/runtime-core/vnode.ts
export type VNodeTypes = string | typeof Text | object // objectを追加;~/packages/runtime-core/h.ts
export function h(
  type: string | object, // objectを追加
  props: VNodeProps
) {..}
VNode に component のインスタンスを持たせるようにもしておきます.
export interface VNode<HostNode = any> {
  // .
  // .
  // .
  component: ComponentInternalInstance | null // 追加
}
それに伴って,renderer の方でもコンポーネントを扱う必要が出てくるのですが,Element や Text と同様 processComponent を実装して,mountComponent と patchComponent (updateComponent) も実装していきましょう.
まずガワから作って詳細な説明をします.
const patch = (n1: VNode | null, n2: VNode, container: RendererElement) => {
  const { type } = n2
  if (type === Text) {
    processText(n1, n2, container)
  } else if (typeof type === 'string') {
    processElement(n1, n2, container)
  } else if (typeof type === 'object') {
    // 分岐を追加
    processComponent(n1, n2, container)
  } else {
    // do nothing
  }
}

const processComponent = (
  n1: VNode | null,
  n2: VNode,
  container: RendererElement,
) => {
  if (n1 == null) {
    mountComponent(n2, container)
  } else {
    updateComponent(n1, n2)
  }
}

const mountComponent = (initialVNode: VNode, container: RendererElement) => {
  // TODO:
}

const updateComponent = (n1: VNode, n2: VNode) => {
  // TODO:
}
では,mountComponent から見てみましょう.
やることは 3 つです.
- コンポーネントのインスタンスを生成
- setup の実行とその結果をインスタンスに保持
- ReactiveEffect の生成とそれをインスタンスに保持
まず,component.ts にコンポーネントのインスタンスを生成するための関数(コンストラクタの役割をするもの)を実装してみます.
export function createComponentInstance(
  vnode: VNode,
): ComponentInternalInstance {
  const type = vnode.type as Component

  const instance: ComponentInternalInstance = {
    type,
    vnode,
    next: null,
    effect: null!,
    subTree: null!,
    update: null!,
    render: null!,
    isMounted: false,
  }

  return instance
}
各プロパティの型は non-null なのですが,インスタンスを生成した段階では null で入れてしまいます.(本家の Vue.js に合わせてこのような設計にしています.)
const mountComponent = (initialVNode: VNode, container: RendererElement) => {
  const instance: ComponentInternalInstance = (initialVNode.component =
    createComponentInstance(initialVNode))
  // TODO: setup component
  // TODO: setup effect
}
続いて setup です.これは今まで render に直接書いていた処理をここで行うようにして,変数ではなくインスタンスに保持させてしまえば OK です.
const mountComponent = (initialVNode: VNode, container: RendererElement) => {
  const instance: ComponentInternalInstance = (initialVNode.component =
    createComponentInstance(initialVNode))

  const component = initialVNode.type as Component
  if (component.setup) {
    instance.render = component.setup() as InternalRenderFunction
  }

  // TODO: setup effect
}
最後に,effect の形成なのですが,少し長くなりそうなので setupRenderEffect という関数にまとめてしまいます.
ここに関しても,やるべきことは基本的に今まで render 関数に直接実装していたものをインスタンスの状態を活用しつつ移植するだけです.
const mountComponent = (initialVNode: VNode, container: RendererElement) => {
  const instance: ComponentInternalInstance = (initialVNode.component =
    createComponentInstance(initialVNode))

  const component = initialVNode.type as Component
  if (component.setup) {
    instance.render = component.setup() as InternalRenderFunction
  }

  setupRenderEffect(instance, initialVNode, container)
}

const setupRenderEffect = (
  instance: ComponentInternalInstance,
  initialVNode: VNode,
  container: RendererElement,
) => {
  const componentUpdateFn = () => {
    const { render } = instance

    if (!instance.isMounted) {
      // mount process
      const subTree = (instance.subTree = normalizeVNode(render()))
      patch(null, subTree, container)
      initialVNode.el = subTree.el
      instance.isMounted = true
    } else {
      // patch process
      let { next, vnode } = instance

      if (next) {
        next.el = vnode.el
        next.component = instance
        instance.vnode = next
        instance.next = null
      } else {
        next = vnode
      }

      const prevTree = instance.subTree
      const nextTree = normalizeVNode(render())
      instance.subTree = nextTree

      patch(prevTree, nextTree, hostParentNode(prevTree.el!)!) // ※ 1
      next.el = nextTree.el
    }
  }

  const effect = (instance.effect = new ReactiveEffect(componentUpdateFn))
  const update = (instance.update = () => effect.run()) // instance.updateに登録
  update()
}
※ 1: nodeOps に親 Node を取得するためのparentNodeという関数を実装してください.
parentNode: (node) => {
    return node.parentNode;
},
多少長いですが,特に難しいことはないかと思います. setupRenderEffect でインスタンスの update メソッドとして更新のための関数を登録してあるので,updateComponent ではそれを呼んであげるだけです.
const updateComponent = (n1: VNode, n2: VNode) => {
  const instance = (n2.component = n1.component)!
  instance.next = n2
  instance.update()
}
最後に,今まで render 関数に定義していた実装は不要になるので消してしまいます.
const render: RootRenderFunction = (rootComponent, container) => {
  const vnode = createVNode(rootComponent, {}, [])
  patch(null, vnode, container)
}
これで Component をレンダリングすることができました.試しに playground コンポーネントを作ってみてみましょう.
このように,コンポーネントに分割してレンダリングができるようになっているかと思います.
import { createApp, h, reactive } from 'chibivue'

const CounterComponent = {
  setup() {
    const state = reactive({ count: 0 })
    const increment = () => state.count++

    return () =>
      h('div', {}, [
        h('p', {}, [`count: ${state.count}`]),
        h('button', { onClick: increment }, ['increment']),
      ])
  },
}

const app = createApp({
  setup() {
    return () =>
      h('div', { id: 'my-app' }, [
        h(CounterComponent, {}, []),
        h(CounterComponent, {}, []),
        h(CounterComponent, {}, []),
      ])
  },
})

app.mount('#app')
ここまでのソースコード:
chibivue (GitHub)
コンポーネント間のやりとり
コンポーネントが使えるようになり,再利用が可能になったわけですが,実際には Props や Emits を利用してもっと便利にしたいわけです. ここからは Props/Emit によってコンポーネント間のやりとりを行えるように実装を進めていきます.
Props
まずは props から実装していきます.
最終的な開発者インタフェースから考えてみましょう.
props は setup 関数の第一引数として渡ってくるようなものを考えてみます.
const MyComponent = {
  props: { message: { type: String } },

  setup(props) {
    return () => h('div', { id: 'my-app' }, [`message: ${props.message}`])
  },
}

const app = createApp({
  setup() {
    const state = reactive({ message: 'hello' })

    const changeMessage = () => {
      state.message += '!'
    }

    return () =>
      h('div', { id: 'my-app' }, [
        h(MyComponent, { message: state.message }, []),
      ])
  },
})
これを元に ComponentInternalInstance に持たせたい情報を考えてみます. props: { message: { type: String } }のように指定された props の定義と,props の値を実際に保持するプロパティが必要なので以下のように追加します.
export type Data = Record<string, unknown>

export interface ComponentInternalInstance {
  // .
  // .
  // .
  propsOptions: Props // `props: { message: { type: String } }` のようなオブジェクトを保持

  props: Data // 実際に親から渡されたデータを保持 (今回の場合、 `{ message: "hello" }` のような感じになる)
}~/packages/runtime-core/componentProps.tsというファイルを以下の内容で新たに作成します.
export type Props = Record<string, PropOptions | null>

export interface PropOptions<T = any> {
  type?: PropType<T> | true | null
  required?: boolean
  default?: null | undefined | object
}

export type PropType<T> = { new (...args: any[]): T & {} }
ユーザーがコンポーネントを実装する際のオプションにも追加します.
export type ComponentOptions = {
  props?: Record<string, any> // 追加
  setup?: () => Function
  render?: Function
}
オプションから渡された props の定義を createComponentInstance でインスタンスを生成する際に propsOptions にセットします.
export function createComponentInstance(
  vnode: VNode
): ComponentInternalInstance {
  const type = vnode.type as Component;

  const instance: ComponentInternalInstance = {
    // .
    // .
    // .
    propsOptions: type.props || {},
    props: {},
肝心の instance.props をどう形成するかというと,コンポーネントのマウント時に vnode が保持している props を propsOptions を元にフィルターします. フィルターしてできたオブジェクトを reactive 関数によってリアクティブなオブジェクトにし,instance.prop にセットします.
この一連の流れを実装するinitPropsという関数を componentProps.ts に実装します.
export function initProps(
  instance: ComponentInternalInstance,
  rawProps: Data | null,
) {
  const props: Data = {}
  setFullProps(instance, rawProps, props)
  instance.props = reactive(props)
}

function setFullProps(
  instance: ComponentInternalInstance,
  rawProps: Data | null,
  props: Data,
) {
  const options = instance.propsOptions

  if (rawProps) {
    for (let key in rawProps) {
      const value = rawProps[key]
      if (options && options.hasOwnProperty(key)) {
        props[key] = value
      }
    }
  }
}
実際に mount 時に initProps を実行し,setup 関数の引数に props を渡してみましょう.
const mountComponent = (initialVNode: VNode, container: RendererElement) => {
    const instance: ComponentInternalInstance = (initialVNode.component =
      createComponentInstance(initialVNode));

    // init props
    const { props } = instance.vnode;
    initProps(instance, props);

    const component = initialVNode.type as Component;
    if (component.setup) {
      instance.render = component.setup(
        instance.props // setupに渡す
      ) as InternalRenderFunction;
    }
    // .
    // .
// .export type ComponentOptions = {
props?: Record<string, any>
setup?: (props: Record<string, any>) => Function // propsを受け取るように
render?: Function
}この時点で props を子コンポーネントに渡せるようになっているはずなので playground で確認してみましょう.
const MyComponent = {
props: { message: { type: String } },
setup(props: { message: string }) {
return () => h('div', { id: 'my-app' }, [`message: ${props.message}`])
},
}
const app = createApp({
setup() {
const state = reactive({ message: 'hello' })
return () =>
h('div', { id: 'my-app' }, [
h(MyComponent, { message: state.message }, []),
])
},
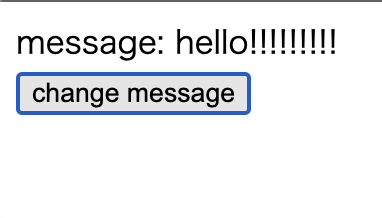
})しかし,実はこれだけでは不十分で,props を変更した際に描画が更新されません.
const MyComponent = {
  props: { message: { type: String } },

  setup(props: { message: string }) {
    return () => h('div', { id: 'my-app' }, [`message: ${props.message}`])
  },
}

const app = createApp({
  setup() {
    const state = reactive({ message: 'hello' })
    const changeMessage = () => {
      state.message += '!'
    }

    return () =>
      h('div', { id: 'my-app' }, [
        h(MyComponent, { message: state.message }, []),
        h('button', { onClick: changeMessage }, ['change message']),
      ])
  },
})
このようなコンポーネントを動作させるために,componentProps.ts に updateProps を実装し,コンポーネントが update する際に実行してあげます.
~/packages/runtime-core/componentProps.ts
export function updateProps(
  instance: ComponentInternalInstance,
  rawProps: Data | null,
) {
  const { props } = instance
  Object.assign(props, rawProps)
}
~/packages/runtime-core/renderer.ts
const setupRenderEffect = (
    instance: ComponentInternalInstance,
    initialVNode: VNode,
    container: RendererElement
  ) => {
    const componentUpdateFn = () => {
      const { render } = instance;
      if (!instance.isMounted) {
        const subTree = (instance.subTree = normalizeVNode(render()));
        patch(null, subTree, container);
        initialVNode.el = subTree.el;
        instance.isMounted = true;
      } else {
        let { next, vnode } = instance;

        if (next) {
          next.el = vnode.el;
          next.component = instance;
          instance.vnode = next;
          instance.next = null;
          updateProps(instance, next.props); // ここ
これで画面が更新されるようになれば OK です. これで props を利用することによってコンポーネントにデータを受け渡せるようになりました! やったね!
ここまでのソースコード:
chibivue (GitHub)
ついでと言ってはなんなのですが,本家 Vue は props をケバブケースで受け取ることができるのでこれも実装してみましょう.
ここで,新たに ~/packages/shared というディレクトリを作成し, general.ts を作成します.
ここは,runtime-core や runtime-dom に限らず,汎用的な関数を定義する場所です. このタイミングで作る意味というのは特別ないのですが,本家に倣ってついでに作っておきます. そして,今回は hasOwn と camelize を実装してみます.
~/packages/shared/general.ts
const hasOwnProperty = Object.prototype.hasOwnProperty
export const hasOwn = (
  val: object,
  key: string | symbol,
): key is keyof typeof val => hasOwnProperty.call(val, key)

const camelizeRE = /-(\w)/g
export const camelize = (str: string): string => {
  return str.replace(camelizeRE, (_, c) => (c ? c.toUpperCase() : ''))
}
componentProps.ts で camelize してあげましょう.
export function updateProps(
  instance: ComponentInternalInstance,
  rawProps: Data | null,
) {
  const { props } = instance
  // -------------------------------------------------------------- ここ
  Object.entries(rawProps ?? {}).forEach(([key, value]) => {
    props[camelize(key)] = value
  })
}

function setFullProps(
  instance: ComponentInternalInstance,
  rawProps: Data | null,
  props: Data,
) {
  const options = instance.propsOptions

  if (rawProps) {
    for (let key in rawProps) {
      const value = rawProps[key]
      // -------------------------------------------------------------- ここ
      // kebab -> camel
      let camelKey
      if (options && hasOwn(options, (camelKey = camelize(key)))) {
        props[camelKey] = value
      }
    }
  }
}
これでケバブケースを扱うこともできるようになったはずです. playground で確認してみましょう.
const MyComponent = {
  props: { someMessage: { type: String } },

  setup(props: { someMessage: string }) {
    return () => h('div', {}, [`someMessage: ${props.someMessage}`])
  },
}

const app = createApp({
  setup() {
    const state = reactive({ message: 'hello' })
    const changeMessage = () => {
      state.message += '!'
    }

    return () =>
      h('div', { id: 'my-app' }, [
        h(MyComponent, { 'some-message': state.message }, []),
        h('button', { onClick: changeMessage }, ['change message']),
      ])
  },
})
Emits
props に引き続き emit の実装をしていきます. emit の実装は比較的ライトなのですぐに終わります.
開発者インタフェース的には emit は setup 関数の第 2 引数から受け取れるような形にします.
const MyComponent: Component = {
  props: { someMessage: { type: String } },

  setup(props: any, { emit }: any) {
    return () =>
      h('div', {}, [
        h('p', {}, [`someMessage: ${props.someMessage}`]),
        h('button', { onClick: () => emit('click:change-message') }, [
          'change message',
        ]),
      ])
  },
}

const app = createApp({
  setup() {
    const state = reactive({ message: 'hello' })
    const changeMessage = () => {
      state.message += '!'
    }

    return () =>
      h('div', { id: 'my-app' }, [
        h(
          MyComponent,
          {
            'some-message': state.message,
            'onClick:change-message': changeMessage,
          },
          [],
        ),
      ])
  },
})
props の時と同じように,~/packages/runtime-core/componentEmits.tsというファイルを作成してそこに実装していきます.
emit は単純に,instance に emit 用の関数を実装し,実行時は vnode が持つ props からハンドラを探し実行します.
~/packages/runtime-core/componentEmits.ts
export function emit(
  instance: ComponentInternalInstance,
  event: string,
  ...rawArgs: any[]
) {
  const props = instance.vnode.props || {}
  let args = rawArgs

  let handler =
    props[toHandlerKey(event)] || props[toHandlerKey(camelize(event))]

  if (handler) handler(...args)
}
~/packages/shared/general.ts
export const capitalize = (str: string) =>
  str.charAt(0).toUpperCase() + str.slice(1)

export const toHandlerKey = (str: string) => (str ? `on${capitalize(str)}` : ``)
~/packages/runtime-core/component.ts
export interface ComponentInternalInstance {
  // .
  // .
  // .
  emit: (event: string, ...args: any[]) => void
}

export function createComponentInstance(
  vnode: VNode,
): ComponentInternalInstance {
  const type = vnode.type as Component

  const instance: ComponentInternalInstance = {
    // .
    // .
    // .
    emit: null!, // to be set immediately
  }

  instance.emit = emit.bind(null, instance)
  return instance
}
これを setup 関数に渡してあげれば OK です.
~/packages/runtime-core/componentOptions.ts
export type ComponentOptions = {
  props?: Record<string, any>
  setup?: (
    props: Record<string, any>,
    ctx: { emit: (event: string, ...args: any[]) => void },
  ) => Function // ctx.emitを受け取れるように
  render?: Function
}const mountComponent = (initialVNode: VNode, container: RendererElement) => {
const instance: ComponentInternalInstance = (initialVNode.component =
createComponentInstance(initialVNode));
const { props } = instance.vnode;
initProps(instance, props);
const component = initialVNode.type as Component;
if (component.setup) {
// emitを渡してあげる
instance.render = component.setup(instance.props, {
emit: instance.emit,
}) as InternalRenderFunction;
}先ほど想定していた開発者インタフェースの例で動作を確認してみましょう!
ちゃんと動いていればこれで props/emit によるコンポーネント間のやりとりが行えるようになりました!
ここまでのソースコード:
chibivue (GitHub)