Let's enable rendering HTML elements
What is the h function?
So far, we have made the following source code work:
import { createApp } from 'vue'

const app = createApp({
  render() {
    return 'Hello world.'
  },
})

app.mount('#app')
This is a function that simply renders "Hello World." on the screen.
Since it's a bit lonely with just a message, let's think about a developer interface that can also render HTML elements.
That's where the h function comes in. This h stands for hyperscript and is provided as a function for writing HTML (Hyper Text Markup Language) in JavaScript.
h() is short for hyperscript - which means "JavaScript that produces HTML (hypertext markup language)". This name is inherited from conventions shared by many Virtual DOM implementations. A more descriptive name could be createVnode(), but a shorter name helps when you have to call this function many times in a render function.
Quote: https://vuejs.org/guide/extras/render-function.html#creating-vnodes
Let's take a look at the h function in Vue.js.
import { createApp, h } from 'vue'

const app = createApp({
  render() {
    return h('div', {}, [
      h('p', {}, ['HelloWorld']),
      h('button', {}, ['click me!']),
    ])
  },
})

app.mount('#app')
As a basic usage of the h function, you specify the tag name as the first argument, attributes as the second argument, and an array of child elements as the third argument.
Here, I specifically mentioned "basic usage" because the h function actually has multiple syntaxes for its arguments, and you can omit the second argument or not use an array for child elements.
However, here we will implement it in the most basic syntax.
How should we implement it? 🤔
Now that we understand the developer interface, let's decide how to implement it.
The important point to note is how it is used as the return value of the render function.
This means that the h function returns some kind of object and uses that result internally. Since it is difficult to understand with complex child elements, let's consider the result of implementing a simple h function.
const result = h('div', { class: 'container' }, ['hello'])What kind of result should be stored in result? (How should we format the result and how should we render it?)
Let's assume that the following object is stored in result:
const result = {
  type: 'div',
  props: { class: 'container' },
  children: ['hello'],
}
In other words, we will receive an object similar to the one above from the render function and use it to perform DOM operations and render it. The image is like this (inside the mount of createApp):
const app: App = {
  mount(rootContainer: HostElement) {
    const node = rootComponent.render!()
    render(node, rootContainer)
  },
}
Well, the only thing that has changed is that we changed the message string to an node object.
All we have to do now is perform DOM operations based on the object in the render function.
Actually, this object has a name, "Virtual DOM".
We will explain more about the Virtual DOM in the Virtual DOM chapter, so for now, just remember the name.
Implementing the h function
First, create the necessary files.
pwd # ~
touch packages/runtime-core/vnode.ts
touch packages/runtime-core/h.ts
Define the types in vnode.ts. This is all we will do in vnode.ts.
export interface VNode {
  type: string
  props: VNodeProps
  children: (VNode | string)[]
}

export interface VNodeProps {
  [key: string]: any
}
Next, implement the function body in h.ts.
export function h(
  type: string,
  props: VNodeProps,
  children: (VNode | string)[],
) {
  return { type, props, children }
}
For now, let's try using the h function in the playground.
import { createApp, h } from 'chibivue'

const app = createApp({
  render() {
    return h('div', {}, ['Hello world.'])
  },
})

app.mount('#app')
The display on the screen is broken, but if you add a log in apiCreateApp, you can see that it is working as expected.
mount(rootContainer: HostElement) {
  const vnode = rootComponent.render!();
  console.log(vnode); // Check the log
  render(vnode, rootContainer);
},
Now, let's implement the render function. Implement createElement, createText, and insert in RendererOptions.
export interface RendererOptions<HostNode = RendererNode> {
  createElement(type: string): HostNode // Added

  createText(text: string): HostNode // Added

  setElementText(node: HostNode, text: string): void

  insert(child: HostNode, parent: HostNode, anchor?: HostNode | null): void // Added
}
Implement the renderVNode function in the render function. For now, we are ignoring the props.
export function createRenderer(options: RendererOptions) {
  const {
    createElement: hostCreateElement,
    createText: hostCreateText,
    insert: hostInsert,
  } = options

  function renderVNode(vnode: VNode | string) {
    if (typeof vnode === 'string') return hostCreateText(vnode)
    const el = hostCreateElement(vnode.type)

    for (const child of vnode.children) {
      const childEl = renderVNode(child)
      hostInsert(childEl, el)
    }

    return el
  }

  const render: RootRenderFunction = (vnode, container) => {
    const el = renderVNode(vnode)
    hostInsert(el, container)
  }

  return { render }
}
In the nodeOps of runtime-dom, define the actual DOM operations.
export const nodeOps: RendererOptions<Node> = {
  // Added
  createElement: tagName => {
    return document.createElement(tagName)
  },

  // Added
  createText: (text: string) => {
    return document.createTextNode(text)
  },

  setElementText(node, text) {
    node.textContent = text
  },

  // Added
  insert: (child, parent, anchor) => {
    parent.insertBefore(child, anchor || null)
  },
}
Well, at this point, you should be able to render elements on the screen. Try writing and testing various things in the playground!
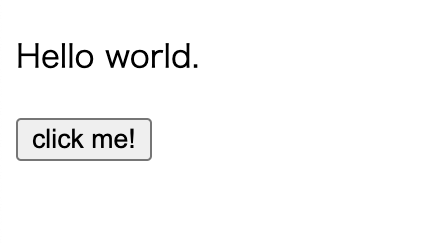
import { createApp, h } from 'chibivue'

const app = createApp({
  render() {
    return h('div', {}, [
      h('p', {}, ['Hello world.']),
      h('button', {}, ['click me!']),
    ])
  },
})

app.mount('#app')
Yay! Now we can use the h function to render various tags!
Since it's lonely just to display
Since we have the opportunity, let's implement props so that we can use click events and styles.
Regarding this part, although it is okay to implement it directly in renderVNode, let's try to proceed while considering the design following the original.
Please pay attention to the runtime-dom directory of the original Vue.js.
https://github.com/vuejs/core/tree/main/packages/runtime-dom/src
What I want you to pay particular attention to is the modules directory and the patchProp.ts file.
Inside the modules directory, there are files for manipulating classes, styles, and other props. https://github.com/vuejs/core/tree/main/packages/runtime-dom/src/modules
These are all combined into a function called patchProp in patchProp.ts and mixed into nodeOps.
Instead of explaining in words, I will try to do it based on this design.
Creating the framework for patchProps
First, let's create the framework.
pwd # ~
touch packages/runtime-dom/patchProp.ts
Contents of runtime-dom/patchProp.ts
type DOMRendererOptions = RendererOptions<Node, Element>

const onRE = /^on[^a-z]/
export const isOn = (key: string) => onRE.test(key)

export const patchProp: DOMRendererOptions['patchProp'] = (el, key, value) => {
  if (isOn(key)) {
    // patchEvent(el, key, value); // We will implement this later
  } else {
    // patchAttr(el, key, value); // We will implement this later
  }
}
Since the type of patchProp is not defined in RendererOptions, let's define it.
export interface RendererOptions<
  HostNode = RendererNode,
  HostElement = RendererElement
> {
  // Add
  patchProp(el: HostElement, key: string, value: any): void;
  .
  .
  .
With this, we need to modify nodeOps to exclude parts other than patchProps.
// Omit patchProp
export const nodeOps: Omit<RendererOptions, "patchProp"> = {
  createElement: (tagName) => {
    return document.createElement(tagName);
  },
  .
  .
  .
Then, when generating the renderer in runtime-dom/index, let's change it to pass patchProp together.
const { render } = createRenderer({ ...nodeOps, patchProp })Event handlers
Let's implement patchEvent.
pwd # ~
mkdir packages/runtime-dom/modules
touch packages/runtime-dom/modules/events.ts
Implement events.ts.
interface Invoker extends EventListener {
  value: EventValue
}

type EventValue = Function

export function addEventListener(
  el: Element,
  event: string,
  handler: EventListener,
) {
  el.addEventListener(event, handler)
}

export function removeEventListener(
  el: Element,
  event: string,
  handler: EventListener,
) {
  el.removeEventListener(event, handler)
}

export function patchEvent(
  el: Element & { _vei?: Record<string, Invoker | undefined> },
  rawName: string,
  value: EventValue | null,
) {
  // vei = vue event invokers
  const invokers = el._vei || (el._vei = {})
  const existingInvoker = invokers[rawName]

  if (value && existingInvoker) {
    // patch
    existingInvoker.value = value
  } else {
    const name = parseName(rawName)
    if (value) {
      // add
      const invoker = (invokers[rawName] = createInvoker(value))
      addEventListener(el, name, invoker)
    } else if (existingInvoker) {
      // remove
      removeEventListener(el, name, existingInvoker)
      invokers[rawName] = undefined
    }
  }
}

function parseName(rawName: string): string {
  return rawName.slice(2).toLocaleLowerCase()
}

function createInvoker(initialValue: EventValue) {
  const invoker: Invoker = (e: Event) => {
    invoker.value(e)
  }
  invoker.value = initialValue
  return invoker
}
It's a bit long, but if you split it, it's a very simple code.
addEventListener is simply a function for registering event listeners as the name suggests. Although you actually need to remove it at the appropriate timing, we will ignore it for now.
In patchEvent, we wrap the listener with a function called invoker and register the listener. Regarding parseName, it simply converts prop key names such as onClick and onInput to lowercase by removing "on" (e.g. click, input). One thing to note is that in order not to add duplicate addEventListeners to the same element, we add an invoker to the element with the name _vei (vue event invokers). By updating existingInvoker.value at the time of patch, we can update the handler without adding duplicate addEventListeners.
Now let's incorporate it into patchProps and try using it in renderVNode.
patchProps
export const patchProp: DOMRendererOptions['patchProp'] = (el, key, value) => {
  if (isOn(key)) {
    patchEvent(el, key, value)
  } else {
    // patchAttr(el, key, value); // We will implement this later
  }
}
renderVNode in runtime-core/renderer.ts
const {
patchProp: hostPatchProp,
createElement: hostCreateElement,
createText: hostCreateText,
insert: hostInsert,
} = options;
.
.
.
function renderVNode(vnode: VNode | string) {
if (typeof vnode === "string") return hostCreateText(vnode);
const el = hostCreateElement(vnode.type);
// Here
Object.entries(vnode.props).forEach(([key, value]) => {
hostPatchProp(el, key, value);
});
.
.
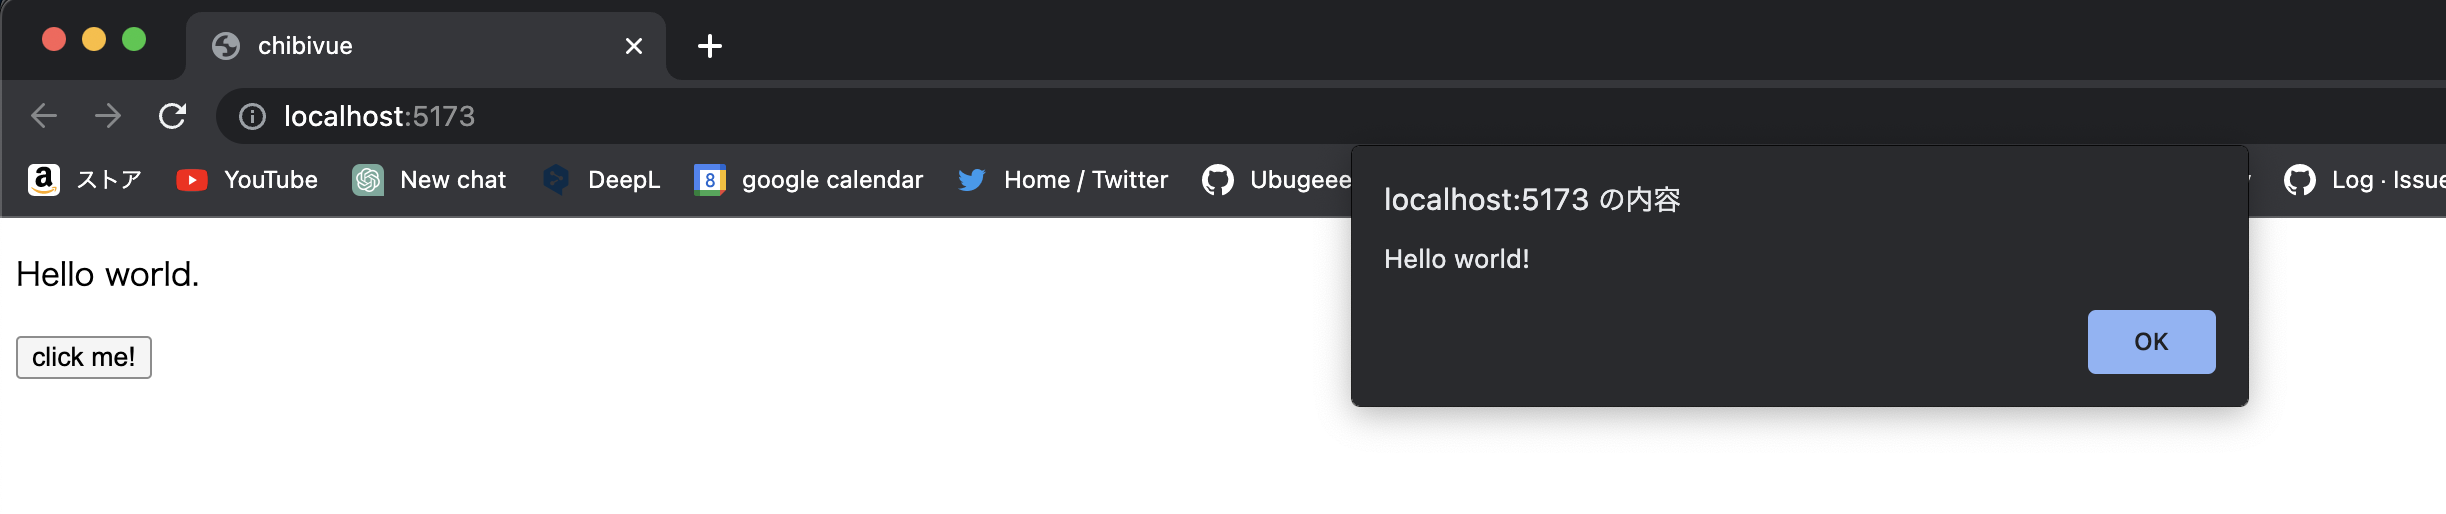
.Now let's run it in the playground. I will try to display a simple alert.
import { createApp, h } from 'chibivue'

const app = createApp({
  render() {
    return h('div', {}, [
      h('p', {}, ['Hello world.']),
      h(
        'button',
        {
          onClick() {
            alert('Hello world!')
          },
        },
        ['click me!'],
      ),
    ])
  },
})

app.mount('#app')
We can now register event handlers with the h function!
Trying to support other props
After this, it's just a matter of doing the same thing with setAttribute. We will implement this in modules/attrs.ts. I would like you to try it yourself. The answer will be attached at the end of this chapter in the source code, so please check it there. Once you can make this code work, you have reached the goal.
import { createApp, h } from 'chibivue'

const app = createApp({
  render() {
    return h('div', { id: 'my-app' }, [
      h('p', { style: 'color: red; font-weight: bold;' }, ['Hello world.']),
      h(
        'button',
        {
          onClick() {
            alert('Hello world!')
          },
        },
        ['click me!'],
      ),
    ])
  },
})

app.mount('#app')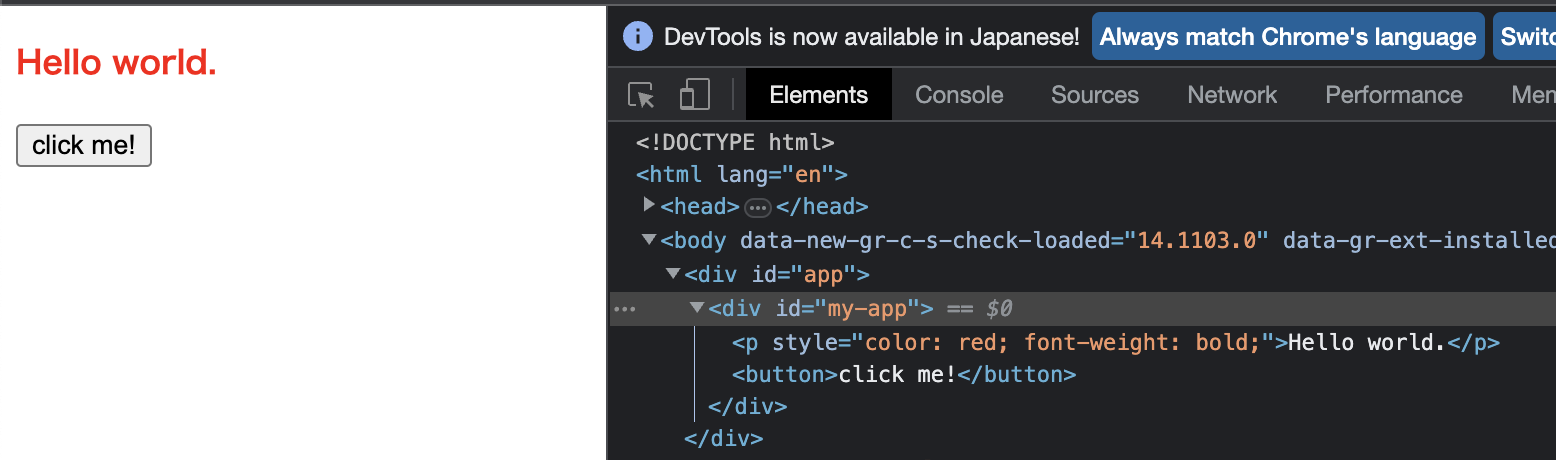
Now we can handle a wide range of HTML!
Source code up to this point:
chibivue (GitHub)