Take a break
Minimal Example section is over!
At the beginning, I mentioned that this book is divided into several sections, and the first section, "Minimal Example Section," is now complete. Well done 😁
If you are interested in Virtual DOM or patch rendering, you can move on to the Basic Virtual DOM section. If you want to extend components further, there is the Basic Component section. If you are interested in richer expressions in templates (such as directives), you can explore the Basic Template Compiler section. If you are interested in script setup or compiler macros, you can proceed to the Basic SFC Compiler section. (Of course, you can do them all if you want!!)
Above all, the "Minimal Example Section" is also a respectable section, so if you feel like, "I don't need to know too deeply, but I want to get a general idea," then you are good to go up to this point.
What have we achieved so far?
Finally, let's reflect on what we have done and what we have achieved in the Minimal Example section.
We now know what we are looking at and where it belongs
First, through the initial developer interface called createApp, we understood how the (web app) developer and the world of Vue are connected.
Specifically, starting from the refactoring we did at the beginning, you should now understand the foundation of Vue's directory structure, its dependencies, and where the developers are working on.
Let's compare the current directory and the directory of vuejs/core.
chibivue 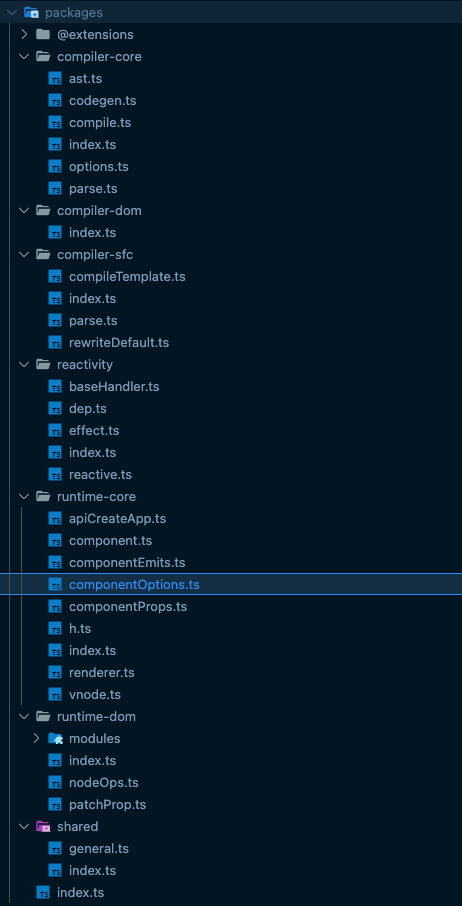
*The original code is too large to fit in a screenshot, so it is omitted.
Even though it's small, you should now be able to read and understand the roles and contents of each file to some extent. I hope you will also challenge yourself to read the source code of the parts we haven't covered this time. (You should be able to read it little by little!)
We now know how declarative UI is achieved
Through the implementation of the h function, we understood how declarative UI is achieved.
// Internally, it generates an object like {tag, props, children} and performs DOM operations based on it
h('div', { id: 'my-app' }, [
  h('p', {}, ['Hello!']),
  h(
    'button',
    {
      onClick: () => {
        alert('hello')
      },
    },
    ['Click me!'],
  ),
])
This is where something like Virtual DOM first appears.
We now know what the Reactivity System is and how to dynamically update the screen
We understood the implementation of Vue's unique feature, the Reactivity System, how it works, and what it actually is.
const targetMap = new WeakMap<any, KeyToDepMap>()

function reactive<T extends object>(target: T): T {
  const proxy = new Proxy(target, {
    get(target: object, key: string | symbol, receiver: object) {
      track(target, key)
      return Reflect.get(target, key, receiver)
    },

    set(
      target: object,
      key: string | symbol,
      value: unknown,
      receiver: object,
    ) {
      Reflect.set(target, key, value, receiver)
      trigger(target, key)
      return true
    },
  })
}const component = {
setup() {
const state = reactive({ count: 0 }) // create proxy
const increment = () => {
state.count++ // trigger
}
;() => {
return h('p', {}, `${state.count}`) // track
}
},
}We now know what Virtual DOM is, why it is beneficial, and how to implement it
As an improvement to rendering using the h function, we understood the efficient rendering method using Virtual DOM through comparison.
// Interface for Virtual DOM
export interface VNode<HostNode = any> {
  type: string | typeof Text | object
  props: VNodeProps | null
  children: VNodeNormalizedChildren
  el: HostNode | undefined
}

// First, the render function is called
const render: RootRenderFunction = (rootComponent, container) => {
  const vnode = createVNode(rootComponent, {}, [])
  // The first time, n1 is null. In this case, each process runs mount
  patch(null, vnode, container)
}

const patch = (n1: VNode | null, n2: VNode, container: RendererElement) => {
  const { type } = n2
  if (type === Text) {
    processText(n1, n2, container)
  } else if (typeof type === 'string') {
    processElement(n1, n2, container)
  } else if (typeof type === 'object') {
    processComponent(n1, n2, container)
  } else {
    // do nothing
  }
}

// From the second time onwards, the previous VNode and the current VNode are passed to the patch function to update the differences
const nextVNode = component.render()
patch(prevVNode, nextVNode)
I understood how the structure of components and the interaction between components are achieved.
export interface ComponentInternalInstance {
  type: Component

  vnode: VNode
  subTree: VNode
  next: VNode | null
  effect: ReactiveEffect
  render: InternalRenderFunction
  update: () => void

  propsOptions: Props
  props: Data
  emit: (event: string, ...args: any[]) => void

  isMounted: boolean
}const MyComponent = {
props: { someMessage: { type: String } },
setup(props: any, { emit }: any) {
return () =>
h('div', {}, [
h('p', {}, [`someMessage: ${props.someMessage}`]),
h('button', { onClick: () => emit('click:change-message') }, [
'change message',
]),
])
},
}
const app = createApp({
setup() {
const state = reactive({ message: 'hello' })
const changeMessage = () => {
state.message += '!'
}
return () =>
h('div', { id: 'my-app' }, [
h(
MyComponent,
{
'some-message': state.message,
'onClick:change-message': changeMessage,
},
[],
),
])
},
})I understood what the compiler is and how the template functionality is implemented.
By understanding what the compiler is and implementing the template compiler, I gained an understanding of how to achieve a more raw HTML-like implementation and how to implement Vue-specific features such as Mustache syntax.
const app = createApp({
  setup() {
    const state = reactive({ message: 'Hello, chibivue!', input: '' })

    const changeMessage = () => {
      state.message += '!'
    }

    const handleInput = (e: InputEvent) => {
      state.input = (e.target as HTMLInputElement)?.value ?? ''
    }

    return { state, changeMessage, handleInput }
  },

  template: `
    <div class="container" style="text-align: center">
      <h2>{{ state.message }}</h2>
      <img
        width="150px"
        src="https://upload.wikimedia.org/wikipedia/commons/thumb/9/95/Vue.js_Logo_2.svg/1200px-Vue.js_Logo_2.svg.png"
        alt="Vue.js Logo"
      />
      <p><b>chibivue</b> is the minimal Vue.js</p>

      <button @click="changeMessage"> click me! </button>

      <br />

      <label>
        Input Data
        <input @input="handleInput" />
      </label>

      <p>input value: {{ state.input }}</p>

      <style>
        .container {
          height: 100vh;
          padding: 16px;
          background-color: #becdbe;
          color: #2c3e50;
        }
      </style>
    </div>
  `,
})
I understood how to achieve the SFC compiler through the Vite plugin.
By implementing the template compiler and utilizing it through the Vite plugin, I gained an understanding of how to implement an original file format that combines script, template, and style into one file. I also learned about what can be done with Vite plugins, as well as transform and virtual modules.
<script>
import { reactive } from 'chibivue'

export default {
  setup() {
    const state = reactive({ message: 'Hello, chibivue!', input: '' })

    const changeMessage = () => {
      state.message += '!'
    }

    const handleInput = e => {
      state.input = e.target?.value ?? ''
    }

    return { state, changeMessage, handleInput }
  },
}
</script>

<template>
  <div class="container" style="text-align: center">
    <h2>{{ state.message }}</h2>
    <img
      width="150px"
      src="https://upload.wikimedia.org/wikipedia/commons/thumb/9/95/Vue.js_Logo_2.svg/1200px-Vue.js_Logo_2.svg.png"
      alt="Vue.js Logo"
    />
    <p><b>chibivue</b> is the minimal Vue.js</p>

    <button @click="changeMessage">click me!</button>

    <br />

    <label>
      Input Data
      <input @input="handleInput" />
    </label>

    <p>input value: {{ state.input }}</p>
  </div>
</template>

<style>
.container {
  height: 100vh;
  padding: 16px;
  background-color: #becdbe;
  color: #2c3e50;
}
</style>
About the Future
From now on, in order to make it more practical, we will go into more detail in each part.
I will explain a little about what to do and how to proceed (policy) for each part.
What to do
From here, it will be divided into 5 parts + 1 appendix.
- Basic Virtual DOM Part
- Implementation of the scheduler
- Implementation of unsupported patches (mainly related to attributes)
- Support for Fragment
- Basic Reactivity System Part
- ref API
- computed API
- watch API
- Basic Component System Part
- provide/inject
- lifecycle hooks
- Basic Template Compiler Part
- v-on
- v-bind
- v-for
- v-model
- Basic SFC Compiler Part
- Basics of SFC
- script setup
- compiler macro
- Web Application Essentials Part (Appendix)
This part is an appendix. In this part, we will implement libraries that are frequently used together with Vue in web development.
- store
- route
We will cover the above two, but feel free to implement other things that come to mind!
Policy
In the Minimal Example part, we explained the implementation steps in quite detail. By now, if you have implemented it, you should be able to read the source code of the original Vue. Therefore, from now on, the explanations will be kept to a rough policy, and you will implement the actual code while reading the original code or thinking on your own. (N-no, it's not that I'm getting lazy to write in detail or anything like that!) Well, it's fun to implement it as the book says, but once it starts to take shape, it's more fun to do it yourself and it leads to a deeper understanding. From here on, please consider this book as a kind of guideline, and the main content is in the original Vue source code!